
About Wiring Harness for LS Swap: An LS engine swap may sound amazing for you looking to get more efficiency, power, and reliability from your car.
However, while you may praise your engine transplant, you may forget the role of your wire harness.
This wire assembly transfers communication and power to your systems, breathing life into them, thus their reliability and safety.
For this reason, let’s see how to connect your wiring harness for LS swap, but let’s discuss it in detail.
What Is Standalone Harness?
The word standalone means independent, and in cars, the word means a wiring harness that works independently from your other electrical wiring system.
It powers any engine during swapping to help it function without using your car’s original wiring system.
Now assume you want to swap your original non-LS engine in your car with an LS engine.
While you can use an LS swap harness, you may run into compatibility problems and wiring complexity.
In such an instance, you can use a standalone harness for LS swapping to make your installation process easier.
In addition, this engine also avoids compatibility problems while allowing you the engine customization flexibility you want.
Expect standalone to be a custom-made wiring harness tailored to your engine requirements.
For this reason, they come with connectors, wires, and systems to control your engine functions.
Additionally, it helps the LS engine communicate with gauges, fuel systems, and transmission without relying on your car’s original wiring.
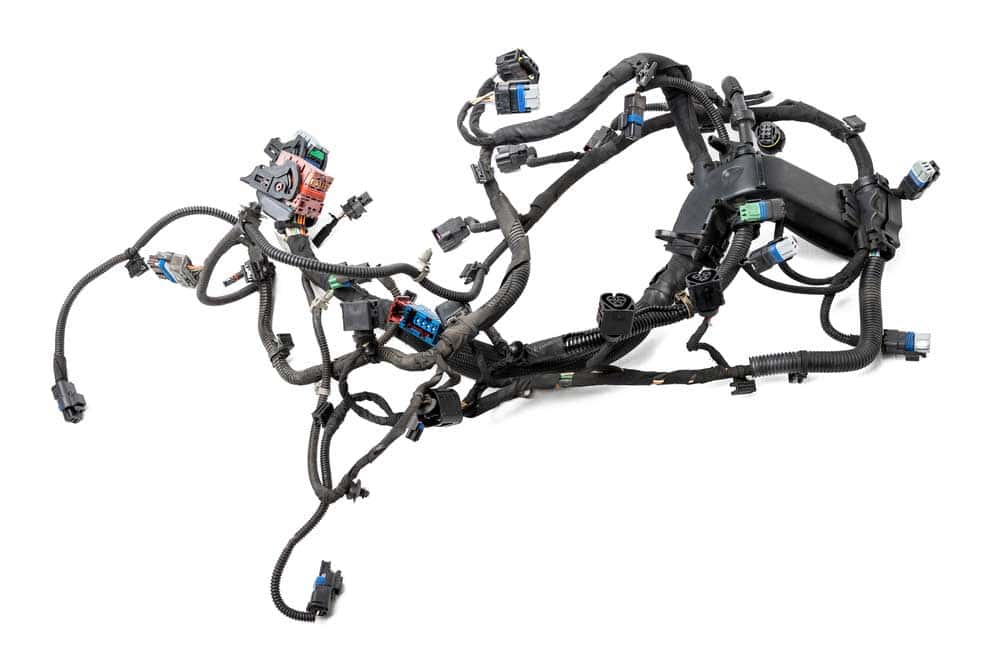
A custom standalone engine harness
What You Need to Know Before Ordering a Standalone Harness
Before installing your standalone harness, I recommend knowing the model of the car that gave you the LS engine.
Knowing this not only helps you when purchasing the harness but also helps when you need replacement parts.
However, if you don’t have this information, you can still use my recommendations to order the standalone harness you need.
Drive-by-Cable/ Drive-by-Wire
As you may know, LS engines come with drive-by-wire (DBW) or drive-by-cable (DBC) throttle bodies.
For this reason, you need to know yours to help you order the right standalone harness. The DBC system means your throttle connects directly to your accelerator using a physical wire.
When you step on the pedal, this cable pulls the throttle open letting more air into the engine, resulting in more power.
On the other hand, in DBW, your commands go electronically via sensors and actuators.
Here, sensors detect your pedal pressing act, prompting your ECU to tell the actuators to regulate the throttle opening accordingly.
As you expect, the DBW complicates the harness since you must connect it to the ECU and throttle pedal connection.
In contrast, the DBC is easier to connect since you just need to attach a cable to the throttle. You can still change your DBW to DBC by installing a mechanical throttle.
But the problem is your car factory intake manifold doesn’t have cable mounting options. Therefore, you either design your man fold or buy an aftermarket one.
Gen 3 vs Gen 4 DWC Throttle Bodies
As if to complicate the wire ordering process further, when you choose the DWC throttle body wiring, you’ve two options.
First, there is Gen 3, which features a 6-pin connector for the LS6 engine. Then there is Gen 4, which comes with an 8-pin connector throttle body for the Vortec engine.
While they may look alike, their sensors’ type and location differ. Additionally, Gen 4 can use a 24 or 58-tooth crankshaft relactor wheel, while Gen 3 can only use a 24-tooth.

Examples of throttle bodies
Transmissions
Another issue to look out for when buying a harness is to know if you have a manual or electronic transmission.
For manual transmission, you will need less wiring in your harness making it cheaper and less complicated to install.
This scenario is mostly because some transmission models like TH350, TH400, and Powerglide do not need an ECU connection.
However, if you go the electronic transmission way, you will need wires for the ECU connection.
In addition, you must know which transmission model to help you purchase a harness with the correct adapters.
Some models include 4L60e, 4L80e, and 6L80e, all with varied and unchargeable plugs.
Injectors
You might also want to know the type of injector because GM used several over the years. For example, it uses Multech, EV1, and EV6 in Gen 3, and EV6 only in Gen 4 engines.
While this may sound complicated you can easily identify them because they look different with different plugging styles.
I also recommend checking the number of your injector (inscribed on its side) and doing an internet search.
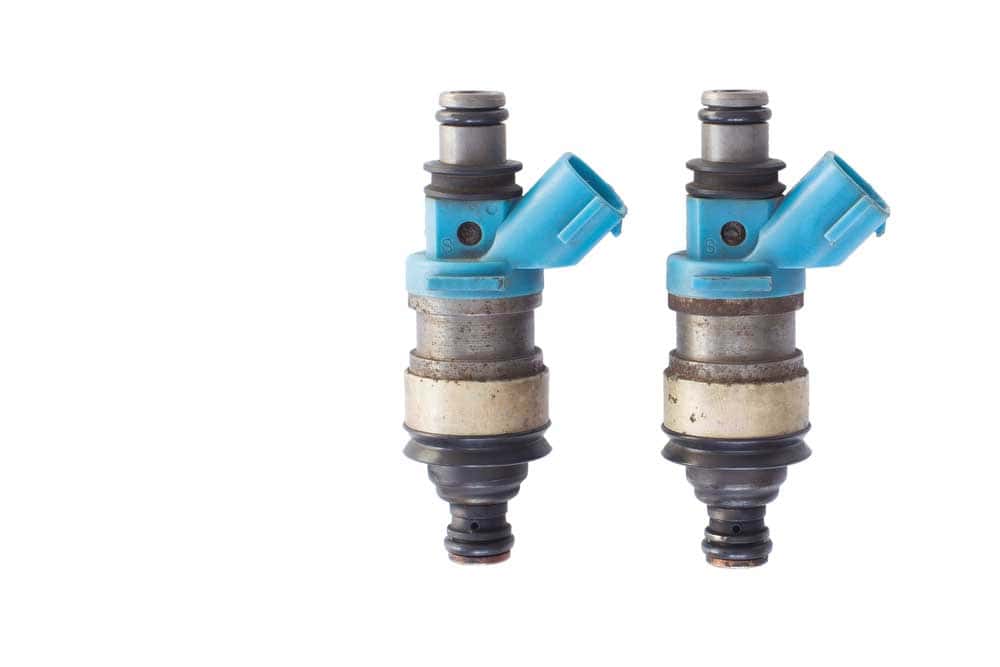
A car fuel injector
Alternator Connections
As GM likes changing their engine parts, they also do the same to alternators. Luckily, they only use a 2-cavity and a 4-cavity alternator.
You should therefore check yours to identify if it requires 2 or 4 pins before buying a standalone harness.
MAF Sensors
Your standalone wire choosing confusion creeps in again since you must consider mass airflow sensors.
To make matters worse, GM uses varied MAF sensors for different engines. For instance, it used a three-pin sensor in LS1, while L2, L6, and Vortec used a 1-piece plus 5-wire design.
Others include five-wire for Voltech and Holden and card-style in L3 and L7. Note that the MAF sensors also connect to your car ECU, hence the need for a harness that caters to it.
MAP Sensors
GM uses only two, which you can identify easily because they are different in appearance. One is the Bosch sensor which has holes for installation bolts.
The other is the Delphi sensor that snaps onto the intake manifold.
Variable Valve Timing
If your engine is GEN 4 without a water pump, it may have a VVT. First, identify it as GEN 4 by identifying its cam sensor on the top right corner.
Then, check if it has a short harness for plugging into the phase actuator of the camshaft.
How to Connect Wiring Harness for LS Swap
Harness Removal
Before you connect the new standout harness, you may want to remove the old one first to get room.
For this, you must start by gathering the necessary tools including wrenches, screwdriver sets, and pliers, wire cutters.
Then, park your car flat and engage the handbrake to make it safe for installation. For further safety, disconnect the battery cables to prevent shock and short circuits.
Now, carefully disconnect every component you connect to your harness, ensuring you do not break it.
From there, unclip any clips or fasteners securing your harness to its route, such as the engine bay or chassis.
Then trace your wire, unclipping any hidden bracket and disconnecting it from the fuse box. Lastly, remove it carefully, clean it, dry it, and store it well.

Wiring in the car engine
ECM Wires
After removing the old harness, you should now lay your new harness somewhere and identify each connection.
You can start by identifying your ECM wires and their connectors, color codes, and number of pins.
Remember, your ECM wires help in functions like ignition timing, fuel injection, emission, etc. Also identify grounding, power, communication, sensors, and other control wires.
You can use the provided wiring diagram to identify them and ensure their accurate connection.
Then, you may connect each ECM wire to its respective pin on the ECM, ensuring a secure and tight connection.
Deepening Process
Here, you attach your wire to the engine, routing it through engine contours. Ensure you do not route it on any moving or hot part to prevent costly damage.
As the engine can be very hot, I recommend using loom covers or heat-resistant sleeves. After you are sure your wire routing is proper, now secure with evenly distributed zip ties.
Fuse Box
As you may know, fuses ensure safety by blowing when you exceed their current rating, thus protecting your components.
Therefore, you must connect your newly found harness to the fuse box in the dashboard or engine bay. You must check the fuse box diagram since each protects a specific wire. You will also need your harness diagram to know which wire goes to which fuse.
Then, ensure each connection is snug and secure any naked joint with insulating tape or heat shrink tubings.
Wiring Driver Side
Hoping you identified where each wire goes, it’s time to connect the systems on the driver’s side. Some systems you need to identify and connect include a starter, alternator, ignition system, and other engine components. Refer to the diagram and color codes to ensure the connection is correct and tight.
Testing
After you have everything in place, it’s time for testing. But before that, you may need to double-check each connection to ensure it’s correct. Doing so can avoid problems with the whole system.
Then, secure all the connections properly, ensure they are tight, and route and bundle cables neatly.
Then reconnect your battery, ensuring both cables are in their right terminals. Now, check every system in your car to ensure it works and you are ready.
Conclusion
With my above detailed research, I hope you can now wire your LS swap harness properly. But remember, you may need a tuner to ensure the correct wheel gear ratio for accurate speed and smooth driving.
